How to Change Payment Method on Amazon [Easy Guide]

How to Change Payment Method on Amazon

If you are looking to change the payment method on Amazon, you are on the right post to get the easy steps to do this. There are many times you want to either change, add or remove the payment method after order i.e. change credit card, delete card or update the details.

Payment method is simply the mode of payment i.e. Credit or Debit Card that you have added to pay for your amazon orders. It can even be a gift card or prepaid card.

You are required to enter the card details that include the  cardholder name, card number and expiry date and billing address associated with the card. The card details are stored on Amazon and can be selected when you go through the order journey, while paying for the order.

Many times you need to change the payment method like a card that got expired. Or it may be a gift card that is used up. There could also be cases where you have temporarily used a card of your friend/family member for payment and need to change the payment method after placing order, back to your default method. Changing or removing these cards that you no longer want to use to pay for your Amazon orders helps to clean the clutter.

How to Change Payment Method on Amazon? You can change the payment methods by going to “Manage payment options” (from the home page first go to the menu 3 horizontal lines and then under “Your Account”) on Amazon mobile app. You can access the same option in your mobile browser by going to amazon.com., then go to “Account” (person icon next to your name) on the website homepage and then tap on the “See All” option next to “Your Account”. Then tap on the “Your Payments” option under the Payments Section.

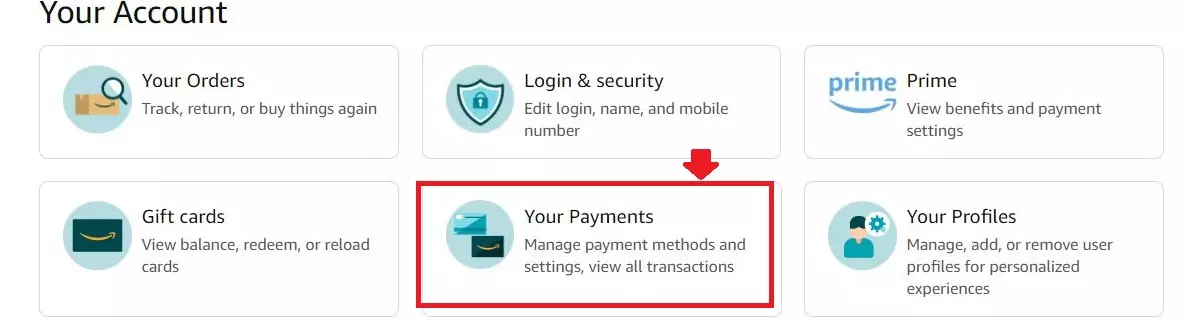
On desktop, you can access this option by first clicking on “Accounts List Option” on website homepage to open the dropdown, next select “Account” and then tap on “Your Payments”  option to view and edit the payment methods.

Let’s cover the step by step guide to help you with this.

Using the steps below you can change or update the payment method after order.

Let’s look at this in detail with screenshots on the step by step process.

How to Change Payment Method on Amazon Mobile App [Steps]

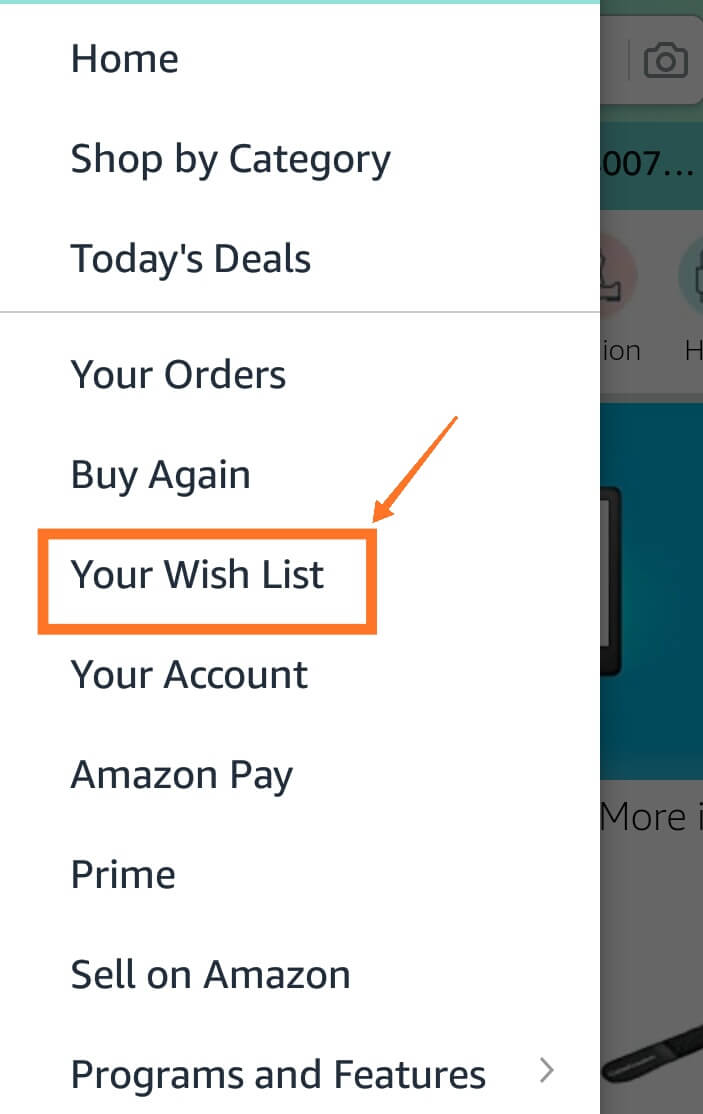
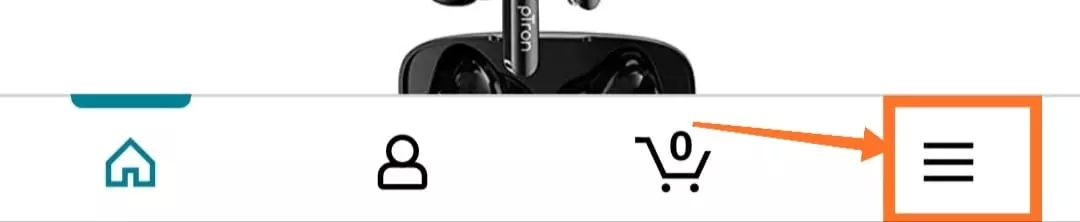
  • Step 1- On the Amazon Mobile App home page, tap on the three horizontal lines at the bottom right to open the menu 
    Amazon app change payment method0
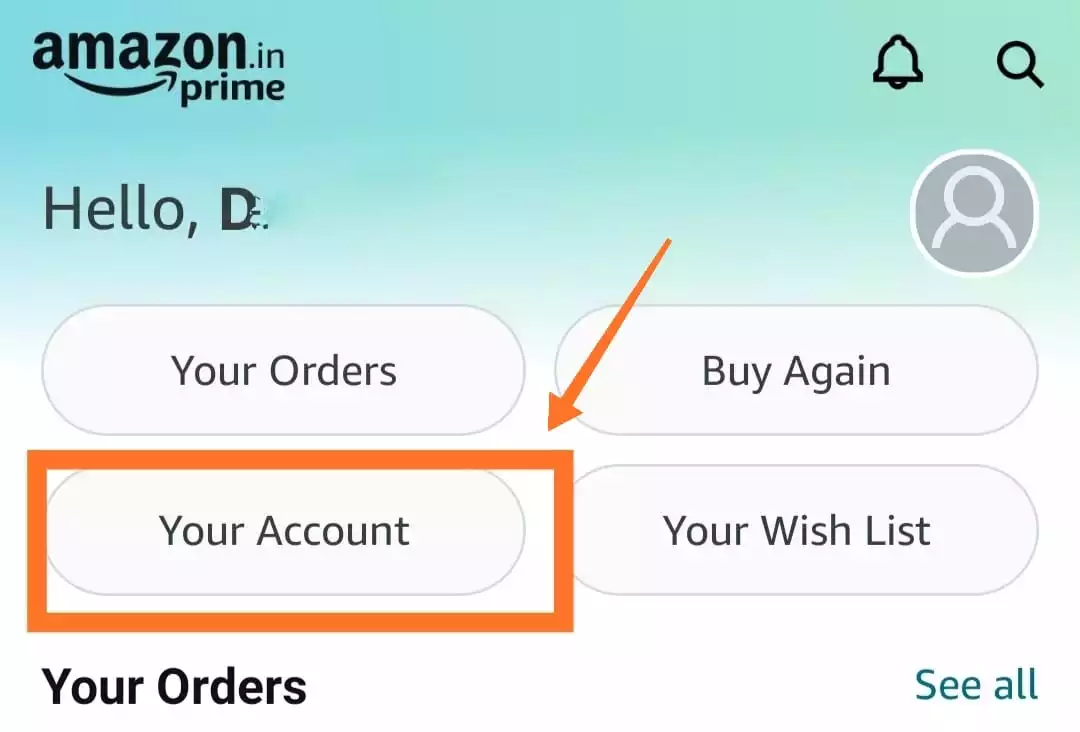
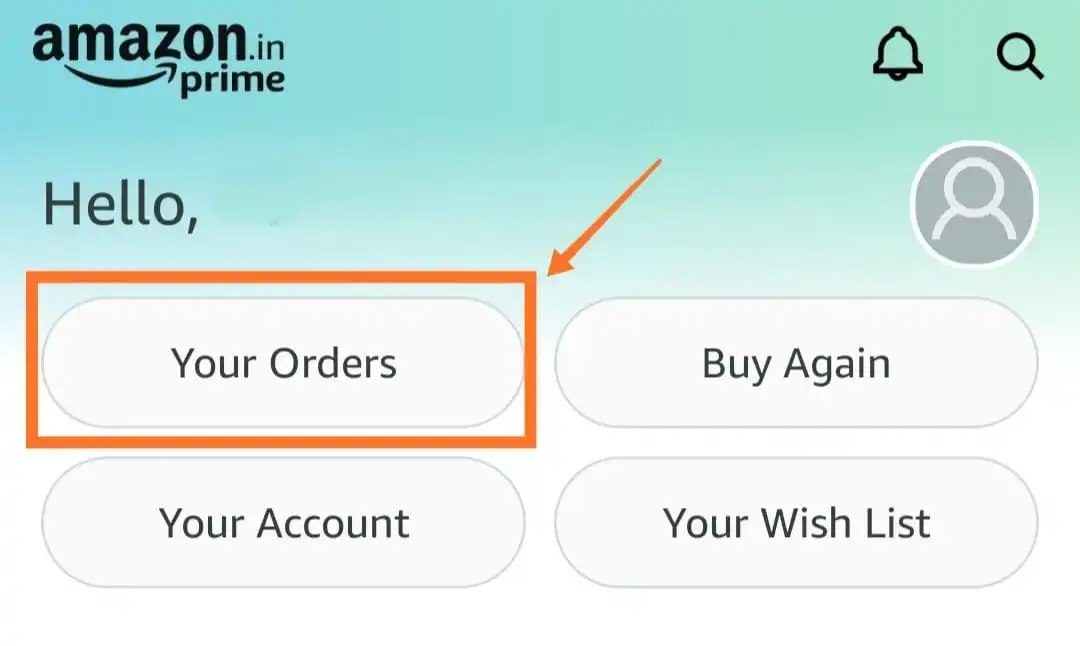
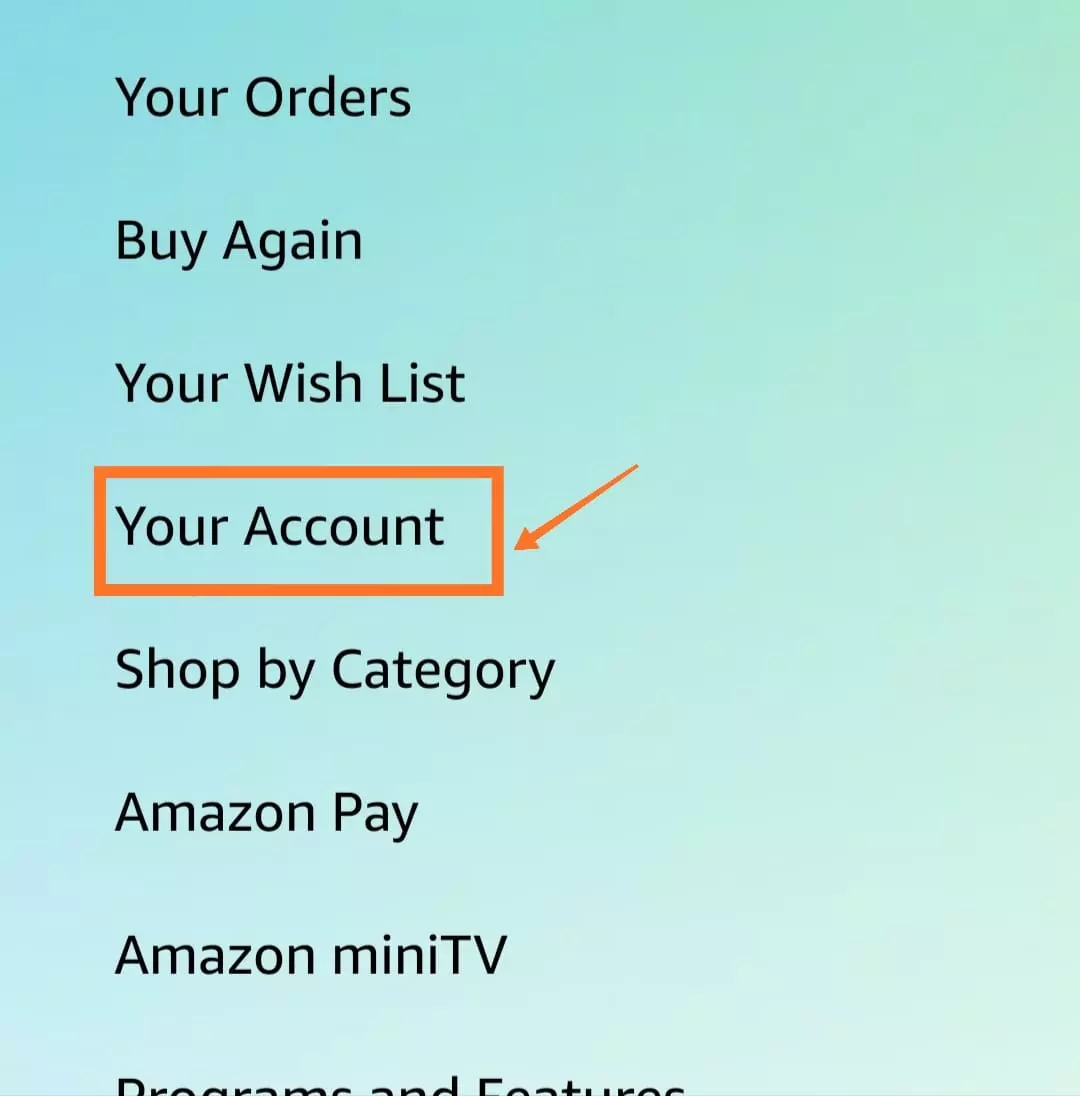
  • Step 2- Next select “Your Account” from list on options
    Amazon app change payment method1
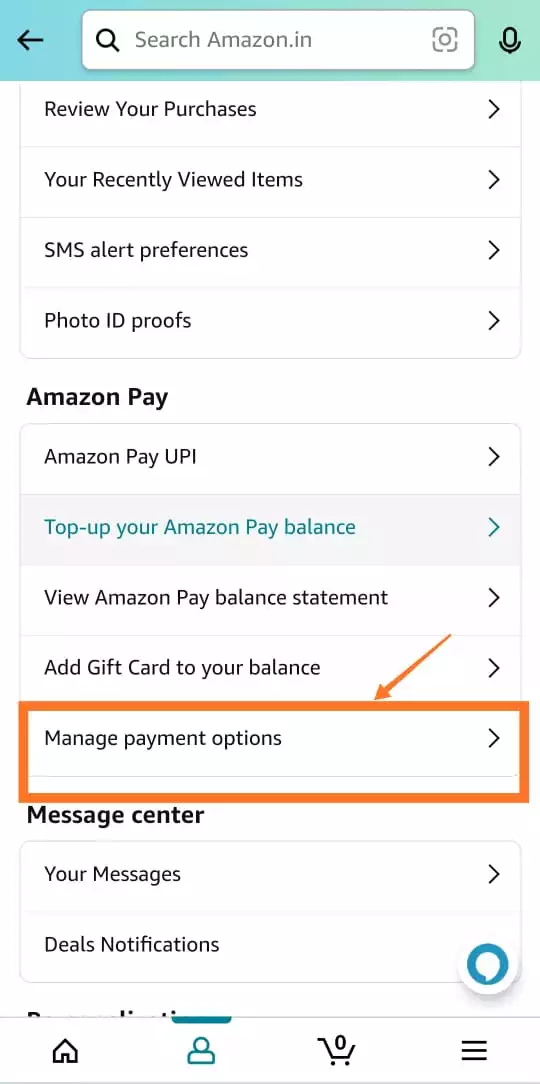
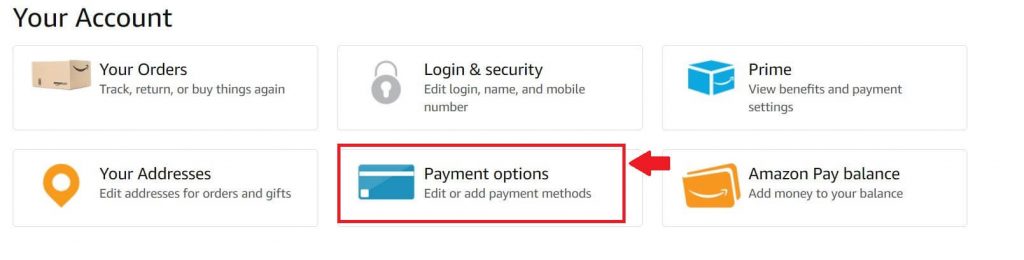
  • Step 3-Next scroll down to the Amazon Pay Section in the list and tap on the option “Manage payment options”  under this
    Amazon app change payment method2
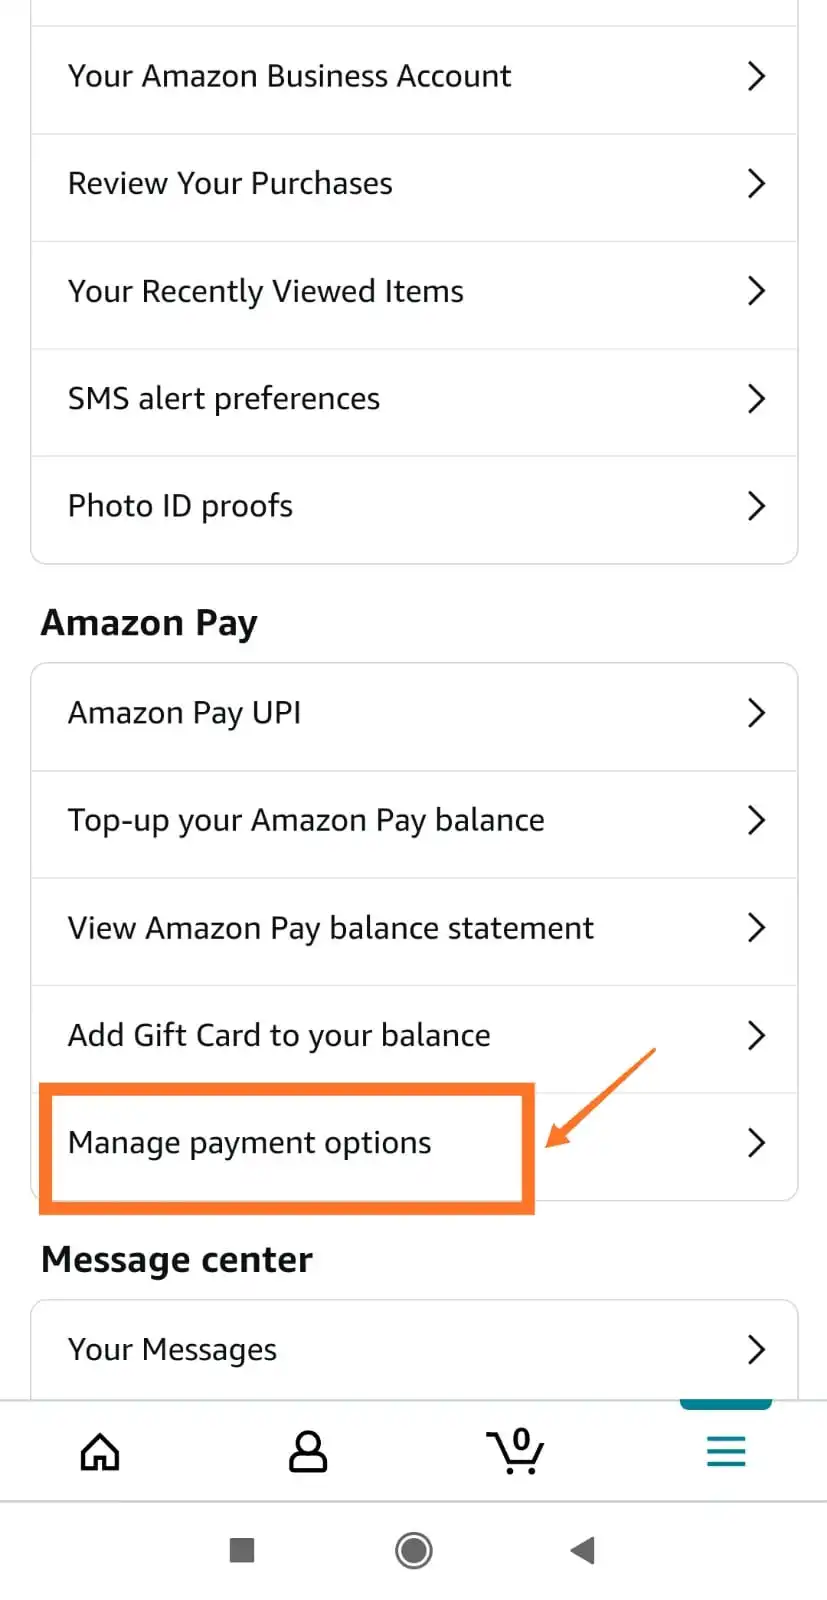
  • Step 4- The payment methods you have added to Amazon will be displayed i.e. credit cards/debit cards etc. under the “Wallet” section. Select the relevant card.
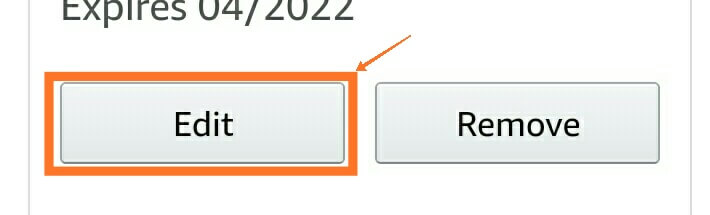
    On the top, you are generally shown the “Purchase Preference” which has the billing address and the default card that you would be using for most of your Amazon Orders.
  • Step 5- Under each card, you get an button to “Edit” or “Remove” card

If you want to change the payment method, tap on “edit” button and change the cardholder name, expiry date.

Amazon does mention that – Removing a card will not cancel any of the open orders on the card but may cancel an existing free trail subscription that you have on it. So even if you remove a card immediately after placing an order, it should not impact the order you placed.

You can also change your default payment method under “Purchase Preference”.

How to Change Payment Method on Amazon Mobile Browser [Steps]

  • Step 1: Open your Mobile browser and login at amazon.com
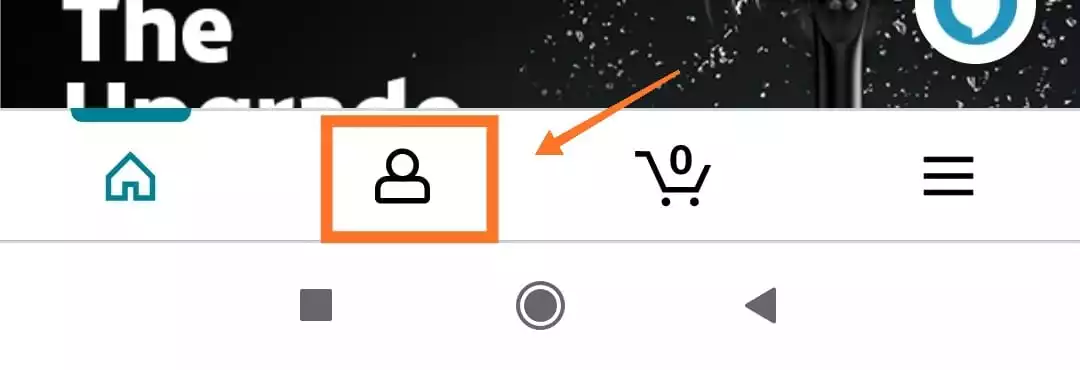
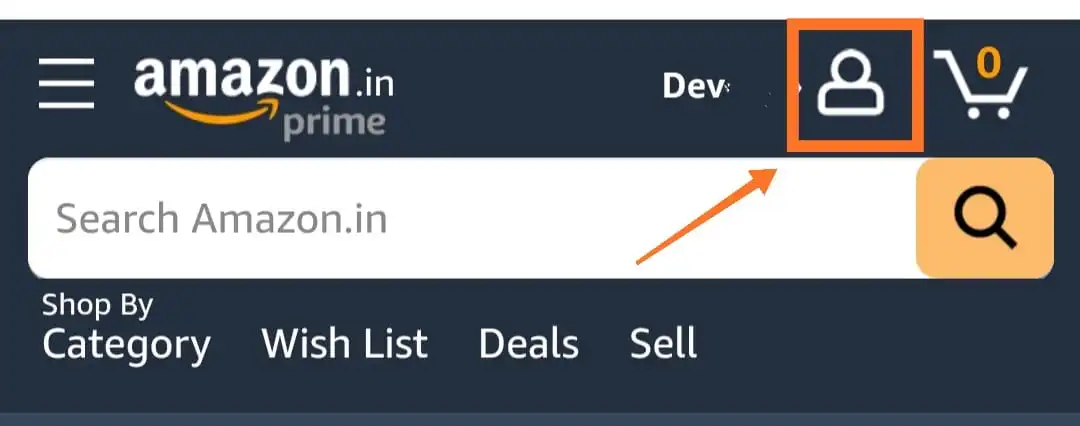
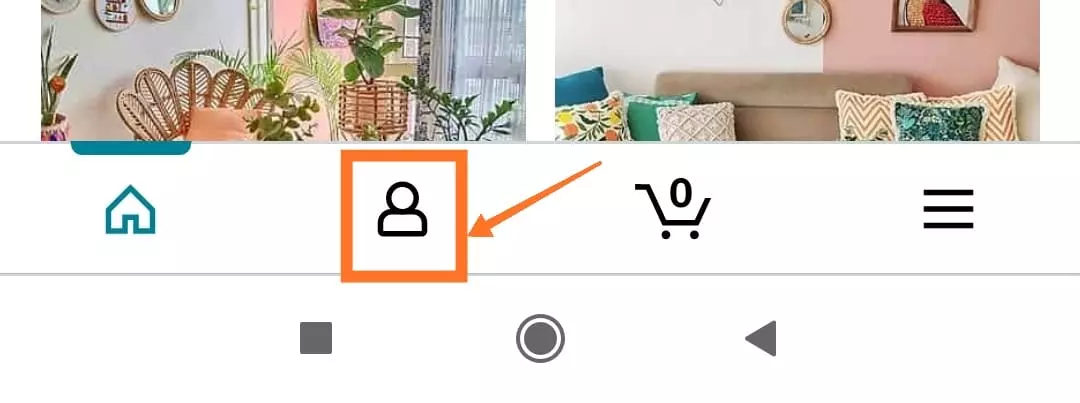
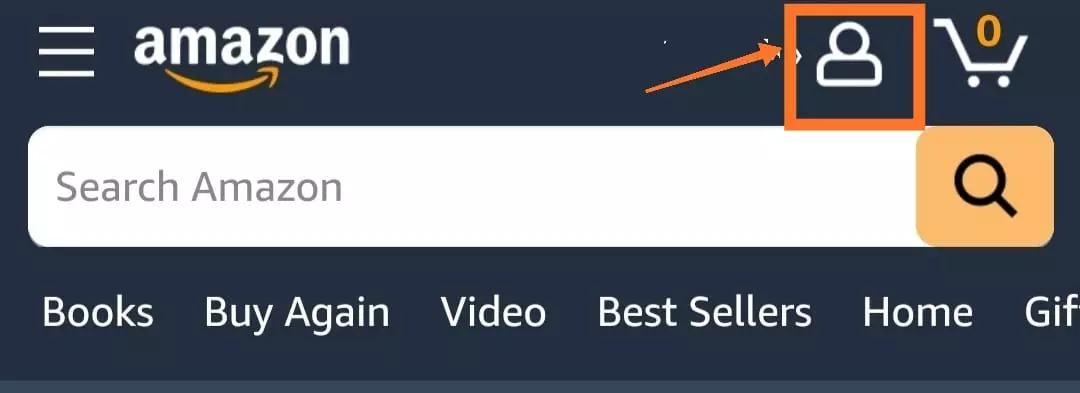
  • Step 2: Next tap on the person icon next to your Amazon username (before cart icon)
    Amazon mobile browser change payment method0
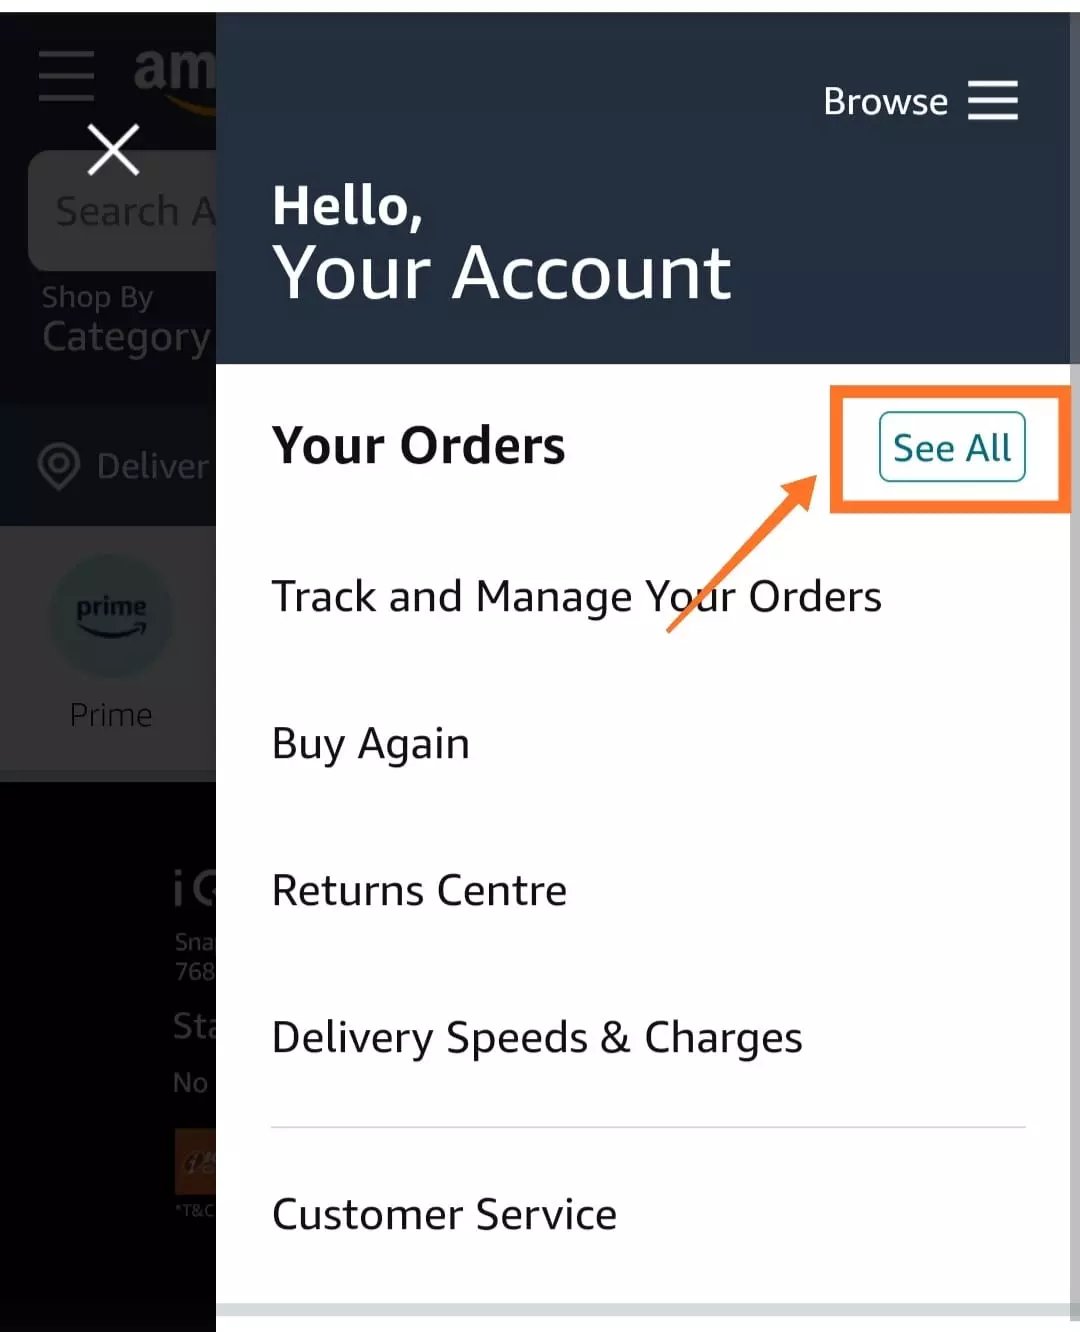
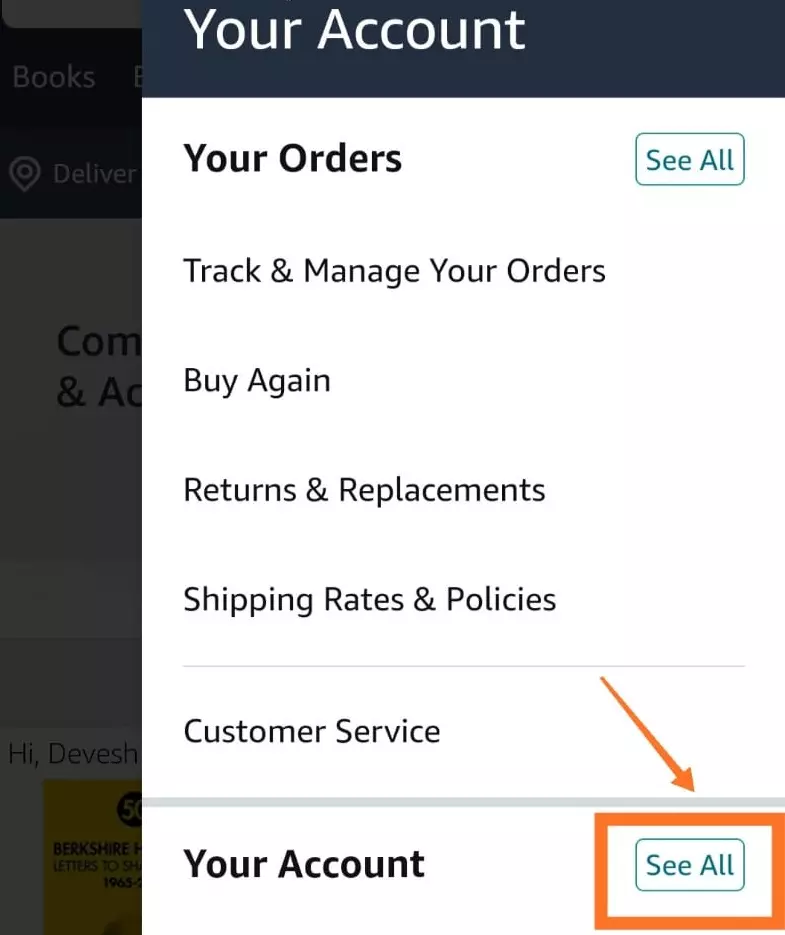
  • Step 3: Next tap on “See All” option displayed next to “Your Account” option
    Amazon mobile browser change payment method1
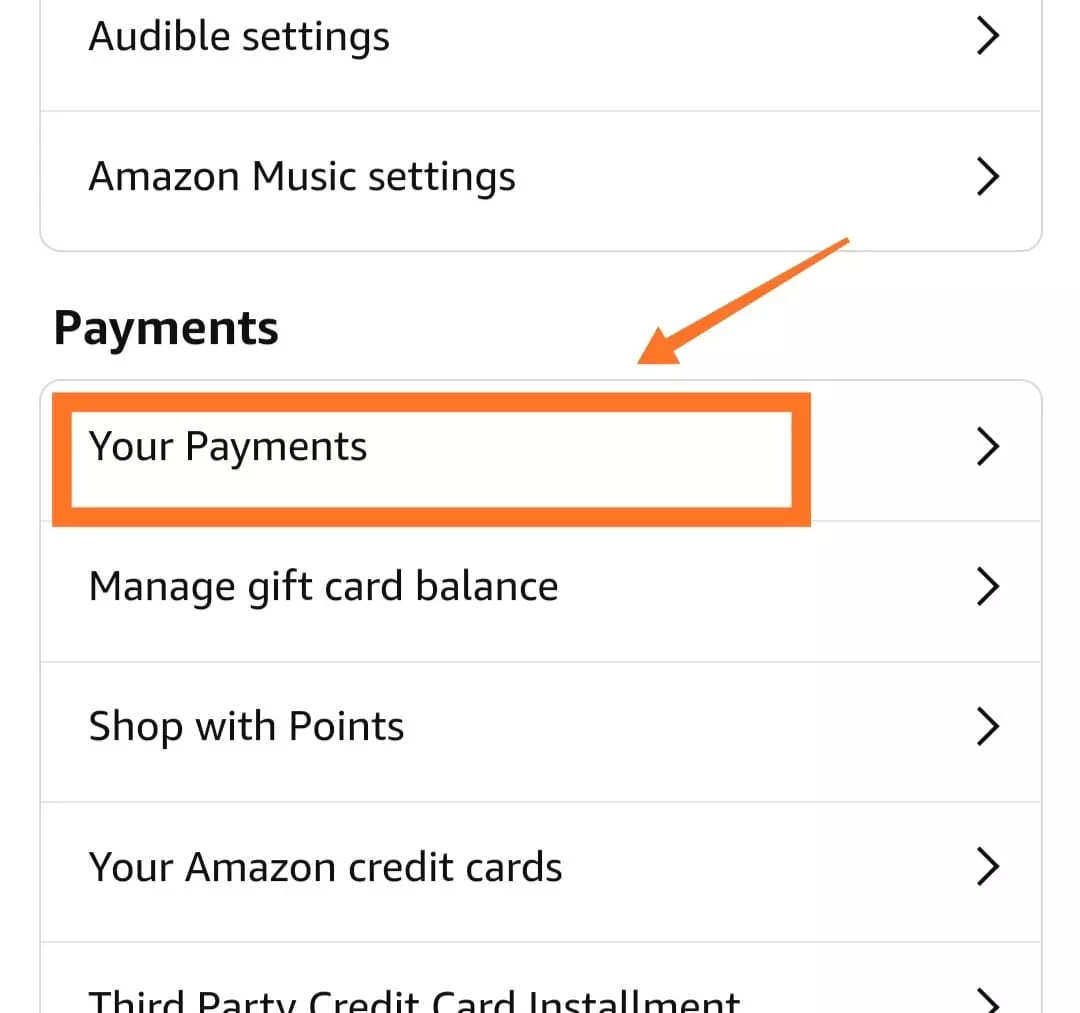
  • Step 4: Scroll down and tap on “Your Payments” option displayed under Payments Section
    Amazon mobile browser change payment method2
  • Step 5: You will be displayed the list of cards which you have added or used to pay for your Amazon orders. Select the card you want to “Edit” or “Remove” in same manner covered in way1.
     

How to Change Payment Method on Amazon Website Desktop [Steps]

  • Open your browser and login to  amazon.com
  • Next tap on the “Accounts & List” Option on Amazon Home Page displayed under your name
    Amazon_Desktop_change_payment_method1
  • Then tap on “Your Payments” option on next page
    Amazon_Desktop_payment_method2
  • On next page, you will see the list of cards you have added to Amazon under “Wallet” and “Cards & Accounts”
  • Click on the the “Edit” option next to the card for which you want to change details
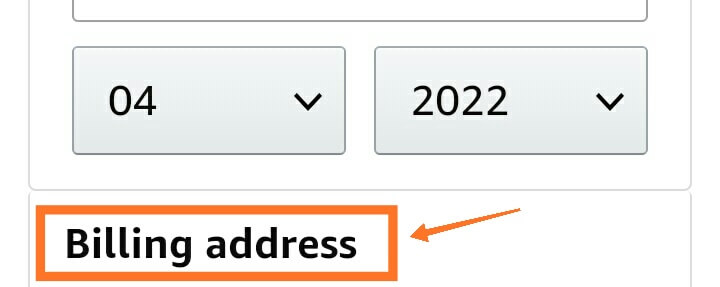
  • This gives you the option to change card details like name of card, expiry date and billing address in Amazon associated with the card
  • You also get an option to remove the card altogether from the wallet. You can use this to remove any expired card that is no longer valid.

For each card you remove, Amazon will ask you to confirm before going ahead. Removing a card does not cancel out any open orders against that card.

Payment Methods accepted by Amazon

Amazon accepts a number of payment methods that you can use for your order. If you check out Amazon’s website, it accepts all the popular network credit and debit cards. In addition, you can also pay using prepaid gift cards

Following payment methods are mentioned as available for use. You can check out this page on Amazon for updated details:

  • Visa (including the Amazon Rewards Visa Signature Card)
  • Amazon Store Card
  • Amazon Secured Card
  • MasterCard/EuroCard
  • Discover Network
  • American Express
  • Diner’s Club (U.S. billing addresses only)
  • JCB
  • NYCE
  • STAR
  • China UnionPay (credit card only)
  • Visa, MasterCard, or American Express prepaid credit or gift cards

Wrap Up

So by using any of the ways above, you can easily change the payment method i.e. credit card, debit card details on Amazon. You can also remove expired cards or cards which you no longer intend to use.

How to Share Amazon Wish List [Share on Facebook, Instagram]

How to Share Amazon Wish List

Amazon Wish List is a handy tool to compile and keep an eye on things you find interesting on Amazon (which may or may not turn into a purchase). But it does not stop at that, you can also share your Amazon Wish List with your friends, family members etc. This guide will help you with all the easy steps on how to share Amazon Wish List including how to share over Facebook, Instagram, WhatsApp, Twitter etc.

Amazon Wish List is a simple but powerful tool. While it was originally created to keep a track of items you could purchase later, it has grown in terms of the uses. Especially when have an occasions like Christmas etc. to make a shopping list for gifts or bunch of things you want when moving to a new home.

Amazon keeps enhancing this feature knowing the multiple uses that can be. One of the many features is the ability to share your Wish Lists.

You can not only create Amazon wish list but also allow others to view them. Not only that, you can even allow the users to edit your list using the share option.

How to Share Amazon Wish List? You can share your Amazon Wish List by going to the menu from app home page, then “Your Wish Lists”, select the list you want to share and tap on the “Invite” Button -which gives you option to share the wish list by sending them a link via email, text message or other apps like Whatsapp, Facebook etc.

For any wish list you create, you can decide the privacy level depending upon whom all you want to share the list with

  • Private- Only you can see the wish list
  • Shared- All people with whom you have shared the link can access it
  • Public- Visible to all people on Amazon (People can search and get access to this

When you share a wish list with someone using the Invite feature, it automatically changes privacy to “Shared” from Private.

With that context, lets talk about the exact steps to share your wish list.

How to Share Amazon Wish List on Mobile App [Including how to share on Facebook]

To share your Amazon Wish List, follow the steps below:

  1. Go to Amazon App and click on 3 lines on the bottom right to open menu
    Amazon app menu
  2. Tap on Your Wish Lists under from the options
    Share Amazon Wish List Mobile App 2
  3. Choose the relevant list (if you have multiple lists) which you want to share
  4. Next click on “Invite Button” which allows you to share the wish list
    Share Amazon Wish List Mobile App 4
  5. Choose one of the following options:
    1. View only: Anyone with a link can view your list without making edits.
    2. View and edit: Invited people can view and edit your list.
      Note: If your list was set up as Private, it changes to Shared.
      Share Amazon Wish List Mobile App 5
  6. Next you get the option to share a link to the wish list- using any of ways below-
    a. Copy the link and send it directly to recipient using any of your preferred wasy
    b. Email the recipient by entering email id on mail app
    c. Send Text Message to recipient
    d. More – this opens up more options to share the Wish List by sending link using other apps like WhatsApp, Facebook etc.
    Share Amazon Wish List Mobile App 6

How to Share Amazon Wish List on Amazon Desktop Mode

The steps to share the Amazon Wish List are pretty similar to the mobile app path:

  1. Go to Amazon Website and hover your mouse over the down arrow next to Accounts & Lists (Note: Don’t click on the down button just hover it to bring up the menu
  2. Select the Wish List you want to share from the “Your Lists”
    Share Amazon Wish List Desktop1
    You can also change or pick a different list on next screen
  3. Next click on “Invite” Button (+ Icon) which allows you to share the wish list
    Share Amazon Wish List Desktop2

  4. Choose one of the following options:
    1. View only: Anyone with a link can view your list without making edits.
    2. View and edit: Invited people can view and edit your list.
      Note: If your list was set up as Private, it changes to Shared.
      Share Amazon Wish List Desktop3
  5. Next you can share the link to the wish list- using any of the options
    Copy the link
    Email
    Share Amazon Wish List Desktop4

Adding Items to a Wish List

You can find the option to add any item to a wish list on all product pages. When browsing through the item page, you will see button to “Add to Wish List” or “Add to List” usually placed a bit below the “Add to Cart” Button.

To every item you add to your wish list, you can also put in a comment, assign it a priority and even fill in how much quantity you need.

On a default setting, Amazon removes an item from your Wish List once you have purchased it. But you can also choose an alternative setting when creating a List i.e. to retain the item on your Wish List even after purchase.

Dont Spoil My Surprise

This option keeps gifts others bought for you secret for several weeks. During this time, the item will show as unpurchased on the list. If you try to buy an item that someone already got you, we’ll let you know so you don’t buy it

Getting a Friend to Share their Wish List

Do you know that Amazon even gives you an option to ask your Friend to share his or her wish list. When you go to the Amazon Wish Lists Page and click on the “Your friends” tab, you get a ready message to ask your Friend if he has created a wish list and request access to it?

It has this standard message which you can use to fire off to your friend’s email. You can always customize it to add your personal touch:

Hi, I was wondering if you had built a list on Amazon. I’d love to see what you really want. Could you share your list with me?

Thanks!

About Public Wish Lists

Earlier Amazon allowed you to search someone’s Wish List using their email id if it’s privacy was “Public”. However, this option doesn’t seem to be working any more. So its better you go through the option of asking your Friend to share their wish List.

Wrap Up

Sharing a Amazon Wish List is as convenient as sharing any other link on the web. And you have a bunch of options like email, text message etc. I prefer email or Whatsapp especially while doing it over mobile.

How to Change Billing Address in Amazon [With Easy Steps]

How to change billing address in Amazon

If you are looking to change your billing address in Amazon, you are on the right post. We will cover the step by step guide on how to change billing address on Amazon whether it is your residential address or shipping address.

Amazon provides you the most convenient options to get the items you want delivered to your doorstep. One good thing in Amazon is the flexibility to use different addresses for your delivery depending upon the scenario.

But before that- do you know the difference between shipping address and billing address in Amazon?

Billing address on Amazon is the address directly linked to the payment method or card (i.e. credit or debit card etc.) which you use to make the payment for your Amazon Orders. It is the address associated with the card that is called as the Billing address.

Shipping address as the name indicates, is the address on which you want to take delivery of the goods for your Amazon Order.

In other words, the Billing address is more of permanent address which is directly linked to your card or payment method. While the shipping address may vary from order to order depending on where you want to receive the delivery. So the billing address gets saved in Amazon as a part of the credit or debit card details.

How to Change Billing Address in Amazon?

To change your billing address on Amazon App, tap on the Person Icon on home page. Next select “Your Account” from list of options and scroll down to select “Manage Payment Options”.  Locate the particular card whose billing address you want to update and click on “Edit” option.

To change billing address on Amazon desktop, click on “Accounts & Lists” on Amazon Home page. Select “Payment Options” on next page and then select the particular card whose billing address needs to be updated. Click on “Edit” option next to card and you will get an option to “Change” billing address on next page.

The billing address can either be chosen from one of your existing addresses or you can even add a new address at this stage.

Alternatively, you can also add or change your address during your order journey after Selecting DELIVERY Address. You will be asked to confirm the card and option to change billing address on the Review Order Screen.

How to Change Billing Address on Amazon Mobile App [Steps]

  1. Tap on the “Person” icon from Amazon App Home Page
    Change Billing Address Amazon-Step 1
  2. Select “Your Account” or “Account” from the list of options
    Change Billing Address in Amazon- Step 2
  3. Tap on “Manage Payment Options” from next screen
    Manage Payment Options 1
  4. On Next screen, you will see the list of cards (under Wallet Section) you use for payment with an option to “Edit” the card details for each card.
  5. Click on Edit and change the billing address for the card on next page

Also Read: How to Share Amazon Wish List [Easy Steps]

How to Change Billing Address on Amazon Desktop [Steps]

On Amazon Desktop, you will find the same option by going to Accounts & Lists

Amazon Billing Address Change on Desktop

Then go to Payment Options. You will be shown the list of cards along with the option to Edit or change the “Billing Address” in the card details-once you select the card.

Amazon Billing Address Change on Desktop2

How did Amazon set my billing address?

When you add a NEW card and place your FIRST Amazon order on that card, you need be extra careful of the billing address. This is because you in the course of your normal Amazon order journey, you have to first confirm the delivery address . And this selected delivery address also gets saved as the billing address for that particular card-since it’s the first transaction on the card.

This is unless you take the trouble to notice the option to manually change the billing address before completing the transaction.

So in circumstances, where you are using a new card to order something at a relative or friend’s delivery address. Be very careful to note that this delivery address could also get saved as billing address of the card in case it’s the FIRST transaction on the card. So do take the trouble to note and change the billing address before completing the transaction.

You are also used to verify your card details since in these scenarios the shipping address will differ from your billing address (associated with the card)

Next time whenever you place an order using the same card, the billing address saved in the FIRST transaction done on that card gets auto-picked as it considered a permanent setting.

However, you can always change the billing address by going to payment settings and selecting the card whose billing address is to be changed.

To add a new address in general- You can go to Account & List option and then selecting “Your Addresses” option from the list of options.

Here, you get the master list of all addresses you have used on Amazon.

Also Read: How to Change Payment Method on Amazon

What gets displayed on Amazon Invoice?

Every Amazon Invoice has details of both the Billing address and Shipping address. If you have only one address on your profile, both the billing and shipping address are same. But both will be printed separately on the invoice.

How to Download Invoice PDF from Amazon Mobile App or Website [Step by Step]

If you are looking for a way to download the invoice for your Amazon Orders, you have the found the right post. We will give you an easy step by step guide to download invoice in PDF from Amazon Mobile App or Amazon Website for any order you placed on Amazon.

Invoice is the most important document for your purchase. Downloading an invoice is especially handy if you purchased an electronic equipment which comes with a warranty period.

In such cases, you often need the invoice to claim warranty. It also helps you understand the seller details and taxes borne by you on the product.

Amazon provides you convenient ways to download the invoice for any order you have raised. The process is quite similar whether you attempt to download invoice via Amazon Mobile App or by visiting Amazon website on laptop/desktop.

How to download invoice for an Amazon Order? You can download the invoice from Amazon Mobile App by going to “Your Orders” option on menu (click on person icon next to your username to open menu). Find and open the order for the desired item and then click on “Download Invoice” button under Order Info section.

Alternatively, you can also download the invoice from Amazon by going to Amazon Website – Click on “Returns & Orders” tab. Find the order for the relevant item and click on the invoice drop-down to download the invoice or warrant slip.

Note: If you are using Amazon app on iPhone, you will get an option to download and open invoice in the app, but it does not actually save the invoice in your iPhone. If you are looking to download and save, you have to open the Amazon website on your mobile browser (Safari) and follow the steps in Way 1 B covered below.

Let’s see the detailed steps to download the Amazon invoice with the relevant screenshots to help you.

How to Download Invoice from Amazon (Website or Mobile App)

  • Way 1: Download invoice from Amazon Website using your Browser on A] Laptop [Using Returns & Orders option] or B] Mobile [Go to “Your Orders option” under Menu]
  • Way 2: Download Invoice using Amazon Mobile App [Your Orders option under Menu]
  • Way 3: Download Invoice from the email received from Amazon on order dispatch

Using the first way and second ways are the best, if you want things much simpler and faster.

Way-1A Download Invoice from Amazon Website using your Browser on Laptop

  • Step 1- Go to the Amazon Website and click on the tab “Returns & Orders” on Home Page

  • Step 2-Scroll through your order list to find the order for the item. You can also search by typing the item name in search bar to find the order quickly (especially if its an old purchase)
  • Step 3- Each order has information like when the order was placed, total amount, Order ID and an Invoice tab drop-down- which you need to click.

  • Step 4- Once you click on the invoice dropdown, it will give you the list of options to download the Invoice, Warranty Packing Slip and any other relevant doc. Once you click on the Invoice, it will open the invoice document in PDF.

Also Read: How to Share Amazon Wish List [All Steps Explained]

Way-1B Download Invoice from Amazon Website using your Browser on Mobile

  • Step 1: Open your Mobile Browser and go to Amazon Website

  • Step 2: Tap on the Account (person icon) on website home page
    Amazon Website Bill download2

  • Step 3: Click on ‘Sell All‘ next to “Your Orders” from the list of options
    Amazon Website Bill Download PDF

  • Step 4: Find the order for item by scrolling down or search the order by typing the description of the item whose invoice to be downloaded in search bar
  • Step 5: After locating the order, click on the option “Order Details”
    Amazon Invoice Download3

  • Step 6: On next screen, tap on the option to “Download Invoice”
    Amazon Invoice Download4

Also Read: How to Change Billing Address in Amazon

Way-2 Download Invoice from Amazon Mobile App

This is a super convenient way to download the invoice using the Amazon App on your mobile. ( Update: Amazon keeps making updates to the app. The invoice download option may not be active for may users, but you can still give it a try. The best way is to go to Amazon website and download the invoice using the steps mentioned in Way 1A)

  • Go to Amazon App and click on your account (Person Icon) on the bottom of the App Home Screen
    Amazon App Bill Download
  • Tap on Your Orders from list of options
    Amazon App Bill Download 2

  • Scroll down to find the item for which invoice is required and tap on the right arrow to open. Alternatively, type the name of item in search bar to finds its order

  • On next screen, you will see further options under “Order Info”. Tap on the button “Download Invoice” under Order Info Section

  • Select Invoice and tap on “Download Document” to download invoice in pdf

Also Read: How to Change Payment Method on Amazon [Easy Guide]

Way-3 Download Invoice from Amazon email received in your inbox on order dispatch

  • Open Gmail App or your email app which is linked to Amazon Account
  • Search your inbox by using the words Amazon Order Dispatch. It will show the list of mails from Amazon.
  • Find the email for the item you are looking for either from the date. Note that the mail we are searching for must have the word “Dispatched” in Subject line followed by the item name.
  • Once you open the email, you will find a button labelled “View or Print Invoice”. This will again take you to your Amazon Account- Sign in and you will be able to download and open your invoice in pdf.

Note: Sometimes the Amazon Email does not give this option to view invoice in some scenarios where there are multiple items dispatch or some cases where invoice is not generated at time of dispatch

WRAP UP

So you can access and download the invoice for any Amazon order using any of these ways . The most easy method is by using Amazon App on mobile or by visiting Amazon website on laptop or mobile. For certain digital products like Kindle Books etc. the invoice option becomes visible only when you access Amazon website on laptop or PC.