
If you are a Facebook user, changing or uploading a Facebook Profile Picture of your choice seems like an easy task. However, there are many questions that may come to your mind like how to get the right Facebook profile picture size, how to upload a profile picture in full size without cropping it, or changing your profile picture without losing likes.
In this detailed guide, we are going to cover the complete tips and tricks to answer all of these questions.
This post will give you a ton of information to simplify your life on Facebook – as far as your profile picture is concerned.
The answer to some of the questions needs a bit of a workaround. That’s just the way Facebook is at the moment, requiring some complicated steps even for simple tasks.
Also, the fact that Facebook constantly makes changes and tweaks to its interface can make things a bit more confusing. But let’s clear that.
Update: Facebook made some changes in 2022 since we originally created this post. It seems that cropping is inevitable now. However, by using Way 1 below, you should be able to reduce the impact of cropping. For best results, we recommend using a square image for the profile picture with you in the middle.
Facebook has two images that sit on your main profile-
- Profile Picture – displayed in a circle shape
- Cover photo – displayed as a rectangular-shaped banner image
You can enhance the look of your Facebook profile by choosing the right size and quality for these images.
First, let’s address the basic question about what size or dimensions to use for Facebook Profile Picture and why it gets cropped. Let’s answer this.
Contents
What’s the Facebook Profile Picture Size and why does it get cropped?
The Facebook Profile picture is displayed in the following dimensions:
- 170 by 170 pixels- For Desktop / Laptop view
- 128 by 128 pixels- For Smartphones
- 36 by 36 pixels- For other featured phones
Note, that this is the size in which the profile picture is displayed and not what is uploaded or stored on Facebook.
You can actually upload a picture of any size. But the minimum width needs to be 170 pixels.
While the dimensions make it look simple, getting the right image size can be confusing. Because when you upload the Facebook Profile picture in a normal fashion, it gets cropped and saved in a square shape automatically (you can reduce the impact or avoid cropping using the ways discussed below)
And the way the cropping is done is that it will crop the height or width (whichever is more) – to make it equal to the size of the smaller side to form a square.
To squeeze in a technical jargon here, a Facebook profile picture has an aspect ratio of 1:1 (Aspect ratio is the ratio of width to height of the image, which is always 1:1 for squares)
For e.g. if the image size is 720 (w) x 480 (h), it will crop the width to make the image a square of 480(w) x 480(h). This is assuming you don’t do zoom-in while uploading the pic.
If you choose to apply full zoom, the photo will be cropped 170 by 170 which is the default display size ignoring both dimensions of the original pic.
However, when it is displayed on your profile or in your posts, it takes the shape of a circle with a diameter equal to 170 pixels.
So ideally, you should choose a square profile picture with yourself in the middle so that the image looks good even when it’s displayed in a smaller format on the mobile. Here you can also use Canva profile picture maker or take the help of tool websites to resize your Facebook Image as per requirement.
Let’s now answer the question of how to upload a Facebook profile picture in full size (no cropping):
How to Upload Facebook Profile Picture Without Cropping
To skip cropping on mobile, go to m.facebook.com using a mobile browser, then upload the image as a post on your timeline and use the “Make Profile Picture” option below the post, which will make the image your Profile Picture without cropping.
- Way 1- Go to m.facebook.com– Login and upload the image as a post on your timeline. Then use the “Make it Profile Picture” option (works best for both iPhone and Android mobile users)
- Way 2- Use Facebook Classic Interface – Upload the image and use the “Skip Cropping” option (on Desktop)
- Way 3- Use Facebook Lite App on Mobile – Upload the image as a post on the timeline and then use the “Make it Profile Picture” option (suitable for Android users since Facebook Lite App is currently not available in the Apple App store)
Let’s talk about these ways in detail:
Way 1 is a preferred choice for iPhone mobile users.
Let’s talk about the details and steps involved in each of these ways.
Way 1- Upload the image as a post and use the”Make it Profile Picture” option [using Mobile Browser]
This hack works great for Mobiles- Android or iPhone.
Use the following steps-Login to your m.facebook.com on your mobile (this even works on a laptop) using Google Chrome or any other browser
- Step 1- Upload the image you want to use as a “Profile Picture” as an image post on your timeline. While posting, you can keep the privacy settings to “Only Me” (since this is a temporary posting which you can delete later)
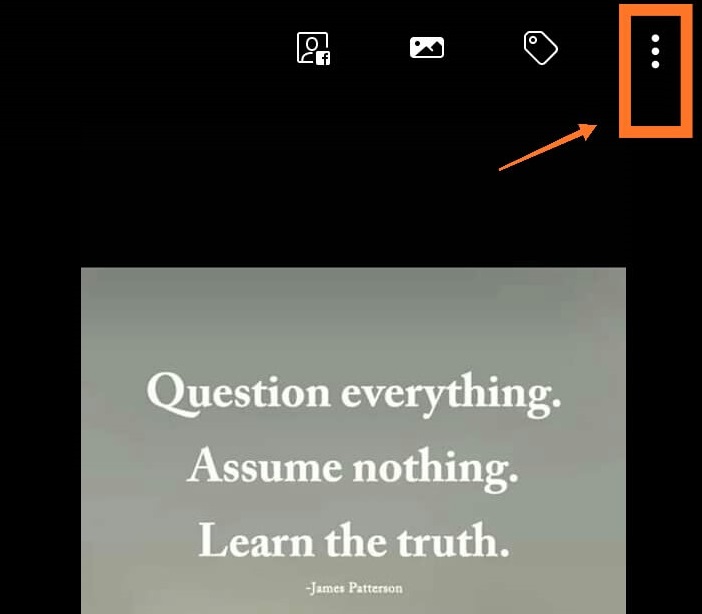
- Step 2- Click the image you posted on your timeline to open it in full and you will see an option to “Make it Profile Picture” BELOW the image. Tap on it
- Step 3- Next it will ask if you want to Switch back to the original profile picture after some time period. Just click on ‘Never’ meaning you don’t want to switch back
- Step 4- You can now see the full image is posted without any cropping as the Profile Picture.
You can delete the image post now that the profile picture is updated.
Way 2- Use Facebook Lite App which has the “Make it Profile Picture” option [for Android]
This is another method to avoid cropping similar to Way 1.
If you have the Facebook Lite app- the smaller and less data-intensive Facebook app version.
Note: This app may not be available for iPhone users and in certain countries.
Step 1-Open Facebook Lite App and upload or post the image you want to use as a “Profile Picture” on your timeline.
While posting, you can keep the privacy settings to “Only Me” (since this is a temporary posting which you can hide later)
Step 2– Next open this image post in full view. Click on 3 vertical dots on the top right of the image
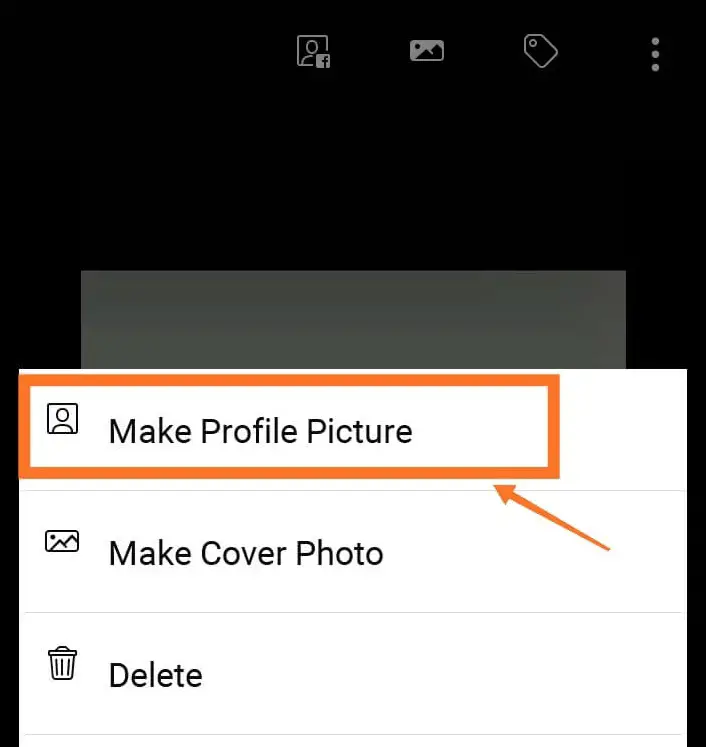
Step 3: You will see an option “Make Profile Picture”. Tap on it and confirm. You will see that the whole image becomes your Profile Picture without any cropping.
Way 3- Use Classic Facebook Interface and use the ‘Skip Cropping’ Option [Not Accessible Now]
Update: This method is no longer working as it is not possible to get the classic interface on the desktop. Please explore way 1 which works even on desktop using Facebook mobile URL.
In the good old days, the Facebook classic interface on the desktop would give you a readymade “Skip Cropping” button when uploading the Facebook Profile Picture. Surprisingly, this useful option is taken away in the new facebook versions.
You could still switch back to the classic interface using extensions, but even this method no longer gives results

Change Facebook Profile Picture without Notifying Anyone
When you change your Facebook Profile Picture, there is an auto-post on your timeline which mentions your profile picture is updated.
You can switch the privacy setting for this particular post immediately from “Public” to “Only Me” which means only you will be able to see this post.
Steps to change Facebook Profile Picture without notifying anyone
- Add the photo as a post to your timeline. While adding you have the option to change the post privacy settings to “Only me”
- Click on the photo in this post and click on the option “Make Profile Picture”
- Your Profile Pic will be updated with this photo and there will be an auto-post about the update. Now immediately go to this auto-post and change the privacy settings of this post to “Only me”
In fact, when you delete a picture from your Facebook Profile Pic Album, it also deletes the auto-post from your timeline.
Change your Facebook Profile Picture without Losing Likes
Got a bunch of likes and comments on your Facebook Profile Picture which you don’t want to sacrifice by changing.
Well, the thing is with Facebook, you don’t really lose the likes and comments.
The likes and comments stay along with the original picture which is stored in your Facebook Profile Picture Album.
So in case you moved to your new Pic that doesn’t get the kind of likes and comments as your old one, you can always switch back to the old profile Pic by going to the Facebook Profile Pic Album and selecting it from there (Don’t do a fresh upload of old profile pic which will cause you to lose the likes and comments)
Other Important Points on Profile Pic
Facebook Profile Picture Guard
Facebook Profile Picture Guard is a great feature to protect your privacy.
If you turn it on, Facebook does not give the option to download your Facebook Profile Pic for any other user.
A random user will also not get any option to share, send in a message, or share your profile pic externally.
It restricts anyone from tagging your profile pic unless the person is your friend.
When you turn on the Facebook Profile Picture Guard, it adds a blue border to your profile pic and also shows a shield symbol below the picture.
Steps to add Profile Picture Guard
- Go to m.facbook.com
- Click on your profile picture to expand it
- Click on the option to “Turn On Profile Picture Guard” below the image
- You will see that your profile pic is now wrapped in a blue border and also has a shield symbol in the bottom center
Also, check this post which gives you all the ways to make your Facebook Photos and Albums private.
Facebook Profile Picture Ideas
You can get creative with your Facebook Profile Picture using a number of ways. Many people mix the cover photo and profile pic to blend seamlessly.
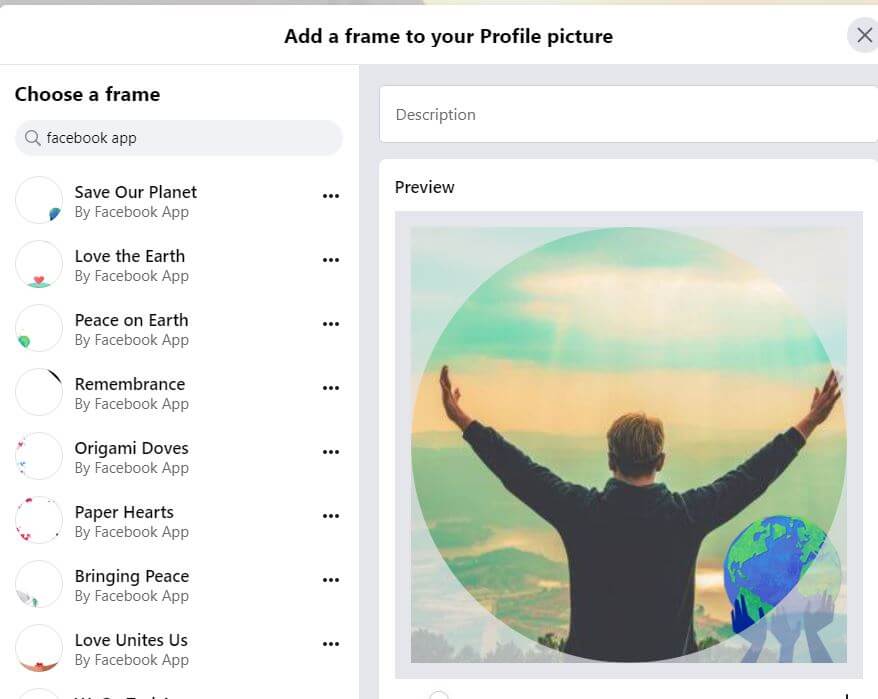
You can also add effects or design using the “Add Frames” option which is available when you click on the update profile picture.
In case you want to keep it private, here are some ideas you can use for having Facebook Profile Picture without a face-
- Cartoon image of yourself
- Facing your back image-Looking towards something scenic
- Hat pulled down look-covering your face
- Having motivational- quotes with images picture
- You can even use the new feature Facebook Avatar– create your own animated Avatar and use it in your Facebook Profile Picture.
Hope you find this article helpful. Do share it with your friends and family to help them get their Facebook Profile Picture right.
I just want to say! I’m so glad I landed on this post. It helped me a lot! So thank you!
I don’t want a profile picture. Its lower center location ruins the banner picture.
Thank you. It’s completely asinine that Facebook removed the option to skip cropping. So incredibly frustrating.
Circle photo for profile was not the best choice.
It didn’t work for me.
Never mind! I edited my original picture to get rid of empty space on the top. Then I followed the steps to get the full picture. Thank you!
There is only the option to make it my cover photo, not my profile pic
I’m trying to use the “make profile picture” feature, but it doesn’t work anymore. It makes the pic in the profile look like a freshly uploaded one: I lose all the likes and the comments. Help!
Have you tried opening facebook in browser with m.facebook.com. It should upload the complete picture that way using “Make Profile Pic” option.